Brake Bracket
|
|
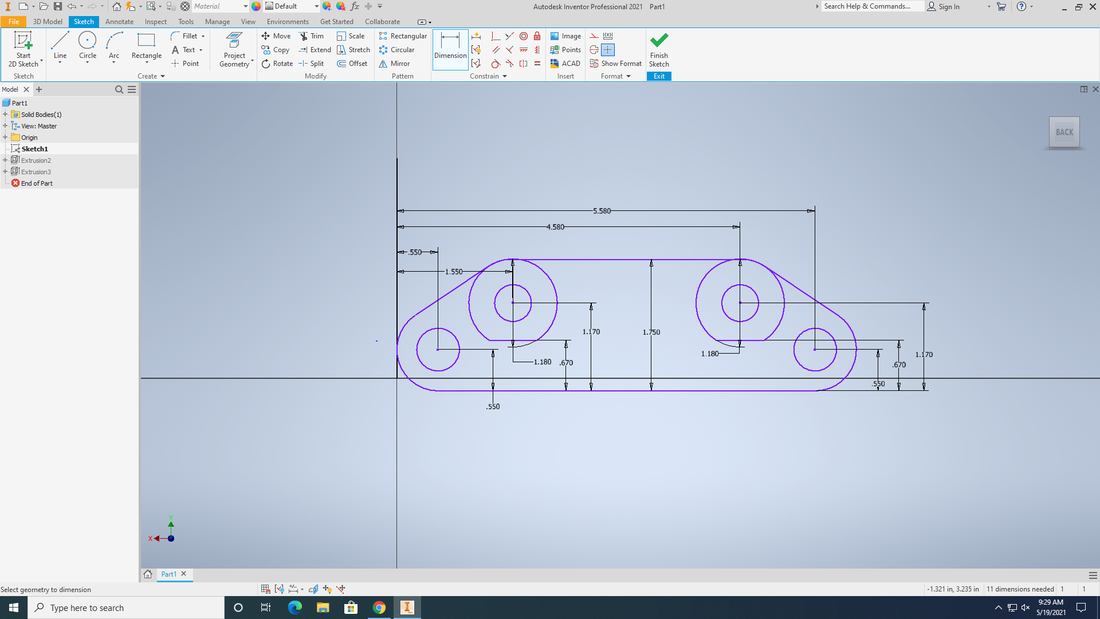
To start the the brake bracket I went into Inventor. I used the template/blueprint to make sure I was using all the right measurements. I needed to learn some new things as well. I learned how to trim, and use the tangent tool. These tools helped to create the round shapes on the brake bracket.

Because of time I was not able to put my own bracket into Fusion. However if we did that would be the next step in making something with the mill. I would go into Fusion 360 to get my brake bracket ready to be cut out using the mill.
|
|
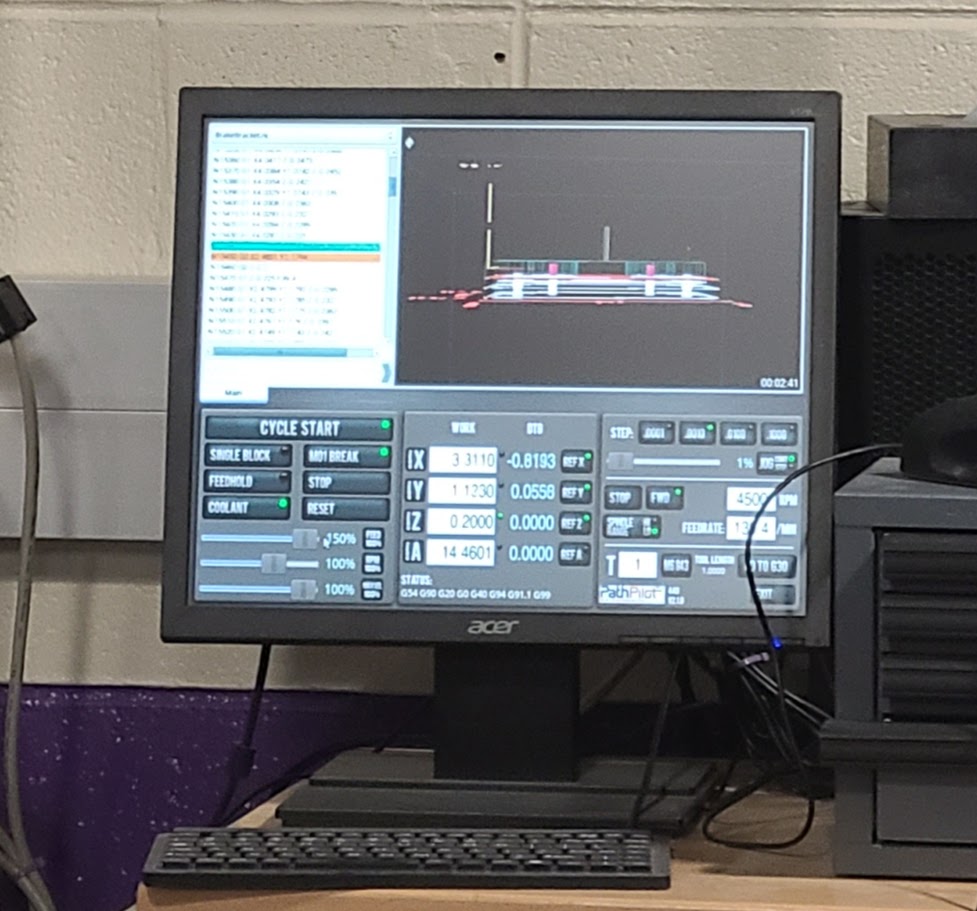
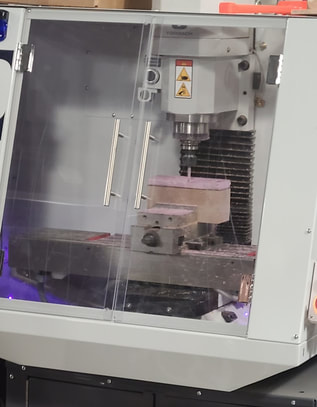
Above are the pictures of setting up the brake bracket on the computer with the software to begin using the mill. The photo on the right is what the mill will look like when it begins to cut out the bracket.
|
|
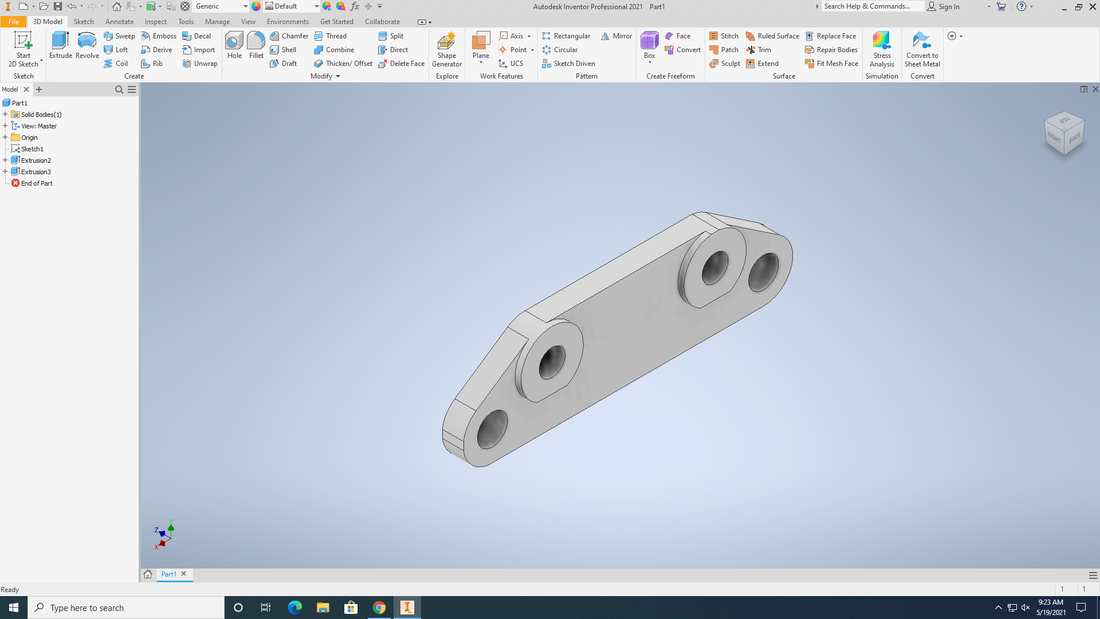
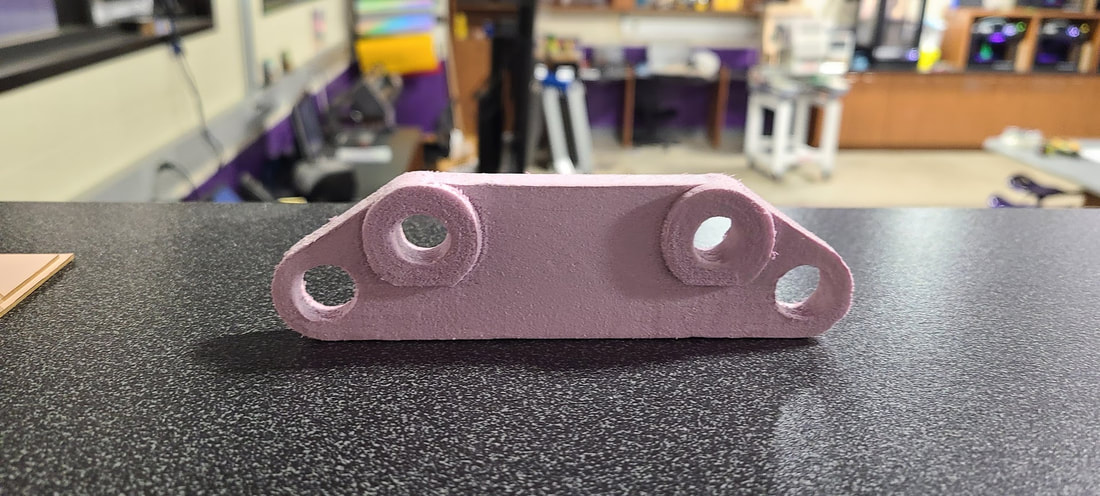
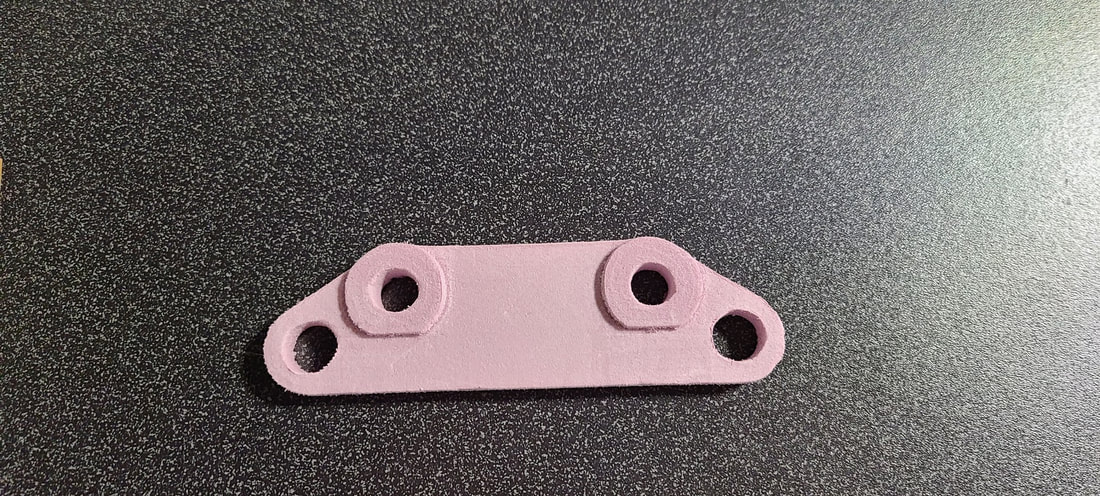
Here are the photos of what the final brake bracket looks like. If I had created a physical one like this I would have engraved my name onto it.
I definitely learned some new things with this project. I learned how to created curved lines and trim off lines I already had in my 3D image in Inventor. I also learned basic Fusion and Mill skill that would make it easier in the future if I ever needed to use again. I enjoyed creating this brake bracket.
